How to Build the Ultimate Live Sound Setup for Any Venue
When it comes to live sound, every venue presents unique challenges. Whether you're setting up for a church service, a live concert, or a corporate event, getting the perfect sound requires the right gear, proper placement, and fine-tuned adjustments. Let’s break down how to build the ultimate live sound setup for any venue, ensuring crystal-clear […]

When it comes to live sound, every venue presents unique challenges. Whether you’re setting up for a church service, a live concert, or a corporate event, getting the perfect sound requires the right gear, proper placement, and fine-tuned adjustments. Let’s break down how to build the ultimate live sound setup for any venue, ensuring crystal-clear audio and an unforgettable experience.
Step 1: Understand the Venue Acoustics
Before selecting equipment, assess the venue’s acoustics. Factors like room size, ceiling height, and materials (wood, glass, carpet) all affect sound reflection and absorption. For example:
- Large, open spaces with hard surfaces create echoes, requiring acoustic treatment or speaker positioning adjustments.
- Small venues may need fewer speakers but require precise placement to avoid the sound bouncing off walls.
Step 2: Choose the Right PA System
The heart of your live sound setup is the PA (Public Address) system. Here’s what you need:
- Mixing Console: Digital mixers offer more flexibility with presets, effects, and remote control options.
- Speakers: Line arrays work well for large venues, while powered speakers are ideal for smaller setups.
- Subwoofers: Essential for deep, punchy bass in music-heavy environments.
- Amplifiers: If using passive speakers, ensure you match amp power ratings to the speaker requirements.
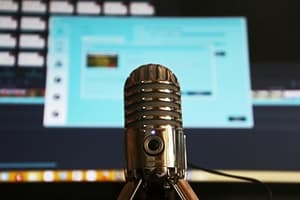
Step 3: Select the Right Microphones
Different events require different microphones:
- Dynamic Microphones (e.g., Shure SM58) for vocals and speech.
- Condenser Microphones for detailed sound capture, ideal for acoustic performances.
- Wireless Microphones for presenters or performers needing mobility.
Step 4: Optimize Speaker Placement
Speaker placement makes or breaks the sound quality. Follow these guidelines:
- Main Speakers: Place at ear level or above, angled slightly downward for even coverage.
- Subwoofers: Position near the stage or evenly spaced to avoid phase cancellation.
- Monitors: Use floor wedges or in-ear monitors to give performers clear audio without feedback.
Step 5: Use Proper Cables and Accessories
Quality cables prevent signal loss and interference. Invest in:
- XLR cables for microphones and balanced connections.
- Shielded speaker cables to minimize interference.
- Power conditioners to protect gear from voltage spikes.
Step 6: Dial in Sound with Proper Mixing
A good mix balances instruments, vocals, and effects. Consider:
- EQ Adjustments: Cut unnecessary frequencies to avoid muddiness.
- Compression: Helps control volume peaks and sustain.
- Reverb & Delay: Adds depth and space without overpowering the mix.
Step 7: Test and Adjust for Each Event
No two venues sound the same. Always do a soundcheck:
- Walk around the venue and listen from different areas.
- Adjust speaker placement if sound coverage is uneven.
- Make last-minute tweaks to the mix based on audience feedback.
Conclusion
Building the ultimate live sound setup requires careful planning, quality equipment, and skilful adjustments. Whether you’re setting up in a church, a live venue, or a conference hall, following these steps will help you deliver exceptional sound every time. Need the best gear for your setup? Explore NXT Level Tech’s range of live sound equipment to take your audio experience to the next level!